7. The Command Line
19 Jan 2018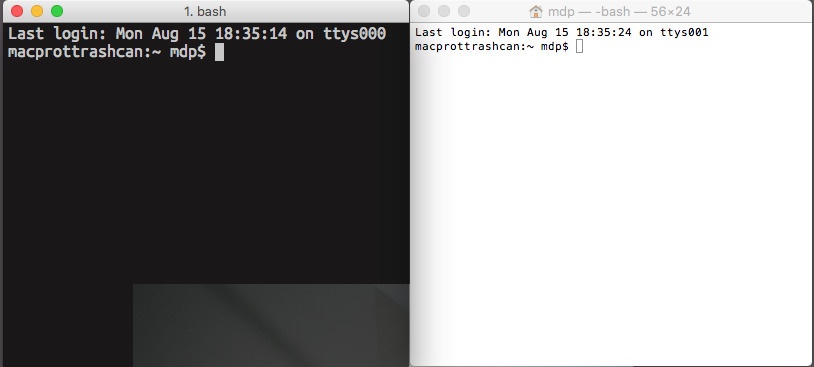
Navigate to the Command Line on Mac OSX (Applications > Utilities > Terminal).
You should see something that looks like the window with a white background at the top of this page. That is the Terminal, a name for a command line interface (often abbreviated as CLI) that is already installed on your computer. Though other aspects of computers have changed drastically over the last fifty years, this has not. In other words, you can see back in time, in a sense, at this level of your computer. Read more about the history of the command line here.
In the above photo you will notice a semi-transparent black window that looks fairly similar to the Terminal. This is iTerm2 and I prefer it to the Mac OSX Terminal. I do not really care which you use (it's a matter of personal preference), and not particularly interesting to talk about right now, just be aware that the same commands work across all CLIs.
Open a new terminal window with
COMMAND-N. You should see something like[HOSTNAME]:~ [USERNAME]$followed by a rectangle. The rectangle is your cursor and demarcates where you can enter text commands for theTerminalto execute.Unix commands, and really anything used in the command line, should be shipped with some sort of
manual. Typically this is accessed by typingman [NAME OF COMMAND]in theTerminaland hitting enter. Let's start by checking the manual for the next command we will use,ls. Typeman lsand hit enter. You should see something that looks like this: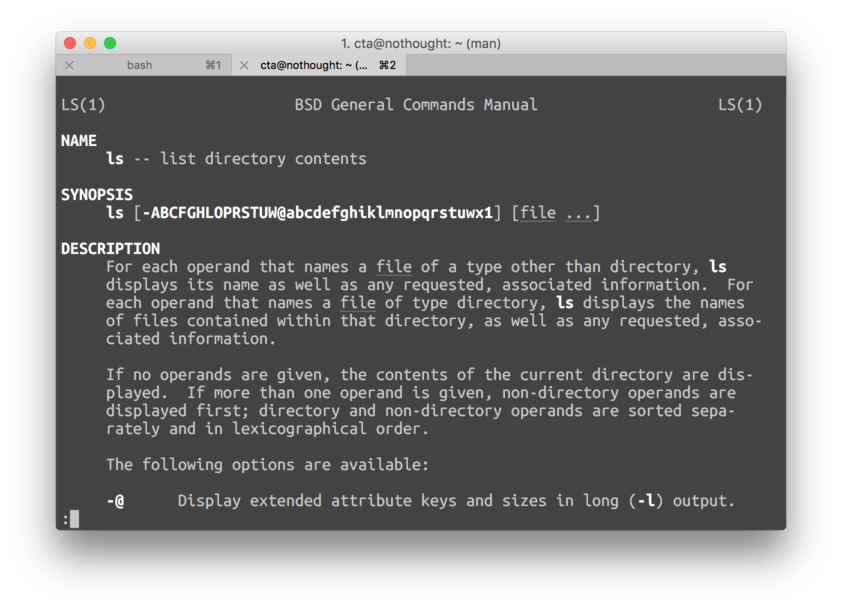
This is the manual for
ls, which opens automatically in a text editor calledVi(also known asVim, short forVi Improved).Vimhas a radically different approach to how a text editor works than Microsoft Word or Apple Pages, which you can read about in detail here.There are two modes in
Vim:NormalandInsert, and toggling between the two modes exposes different features of the application.Normalis typically reserved for navigating through a file or reading. To navigate the file you can use thej(down) andk(up) keys. In order to quit a file you simply typeq.We will discuss how to use
Insertmode, and other commands, in the future. Right now its more important to take some time to read through themanualforls. It is considered standard practice for developers to include amanfile for virtually everything that you use in the terminal, makingmana very important command to commit to memory.Note: google
vim vs emacsto see an example of how passionate people get about their tools (these arguments are frequently referred to as "religious").Type
lsand then hitENTER.lslists the contents of the directory you are currently in. When you open a newTerminalwindow you will default to your user's home directory. We can confirm this by running the commandpwd(print working directory), which will return/Users/[USERNAME].To move to a different directory, type
cdat the command line and then the name of the directory.Terminalhas autocomplete, so type the first two characters of the directory, for example, and then hit theTABkey, which is less work (yay!). On my machine I can move to a directory namedgitby running the following command:cd git/wherecdmeanschange directoryto the directory namedgit.You can move around on the command line with arrow keys, but there are also shortcuts like
CTL-Ato go to the beginning of the line andCTL-Eto go to the end of the line. If you make a bunch of mistakes and just want to start over you can issue aKeyboardInterruptby hittingCTL-C, which will result in a new line.Check to make sure you are in your home directory (
pwd) and then make a new directory by typingmkdir NEWDIRECTORY, whereNEWDIRECTORYis the name of your folder (name it whatever you want).In the next sequence, we will move into our
NEWDIRECTORYand create a text file namedtest.txt:cd NEWDIRECTORYpwdtouch test.txtls
Next lets write something in our text file using a text editor called Nano (which is already installed on your machine, just like
Vim):nano test.txtthis is my text
Save your changes with
Ctl-O, hitEnterto confirm the file name, thenCtl-Xto exit.In the following sequence we will use the Unix command
grep, which searches plain-text data sets for lines matching a regular expression (definition sourced from here):- Click here to go to the
.txtversion of The Project Gutenberg EBook of Alice in Wonderland, by Lewis Carroll. - Click anywhere on that page,
Command-Ato select all,Command-Cto copy to clipboard. - Back in your terminal, make a new text file called
alice.txt:touch alice.txt - Open the file with Nano:
sudo nano alice.txt(don't forget about autocomplete with theTABkey!), you should enter your password and then hitEnter - Click anywhere in the window,
Command-Vto paste the contents of the.txtversion of Alice in Wonderland into the file, Ctl-O to save, Enter to confirm file name, Ctl-X to Exit. Now you can search all of Alice in Wonderland for every line that contains some
regular expression(which you specify between quotes), which could be a word, or a string of words, but is by default case sensitive.Example 1:
grep 'home' alice.txtresults in:"Why, Mary Ann, what are you doing out here? Run home this moment and this creature, when I get it home?" when it grunted again so violently
Example 2: the words 'hello', 'sorry', and 'god' do not occur in the entire text of Alice in Wonderland. In other words,
grep 'god' alice.txtreturns nothing.Note: in the future our goal would be to eliminate the steps that required the use of mouse and a web browser.
- Click here to go to the
Let's go ahead and delete the example files we made.
rmremoves files. When you need to delete a file, runrm NAMEOFFILE. If you try to usermon a directory, like the one you made for thetest.txtandalice.txtfiles, theTerminalwill stop you (as a safety measure) becauseUnixthinks that directories should only be removed when they are empty. So, there are two approaches to getting around this kind of an issue:- manually
rmevery file in the directory (this sucks because its repetitive, error-prone, and time-consuming) and then usermdir NAMEOFDIRECTORYto remove the empty directory. - ALTERNATELY, the cooler (lazier) way to do this is to use
rm -r NAMEOFDIRECTORYto recursively remove all contents of the directory.
Note: Sometimes, in order to do certain things in the terminal, you may need to prepend a command with
sudo. "Sandwich," from the web comic series XKCD, sumssudoup nicely:
sudomeanssuper user doand forces the computer to let you do something. The standard practice is to avoid usingsudounless you know you have to, which often takes some guessing the first time.For example: I normally try a command without
sudofirst and, if I get a permissions error as a response, then run the following on a new line:sudo !!.Note: The command
!!, which is pronouncedbang bang, is a shortcut to repeat the previous command entered into the terminal. In other words, this command prependssudoto whatever you ran in the terminal previously.- manually
ls -l
The Unix command ls can do a lot more than just list the contents of a directory. If you run ls -l you can see a full list of the following information (sourced from here):
- total files in the directory and subdirectories
- the names of the files in the current directory
- their permissions
- the number of subdirectories in directories listed
- the size of the file
- and the date of last modification
Go ahead and try running this command in a few different directories. Try home, Applications, and a new directory, made by you (mkdir), on the Desktop expressly for this purpose.
Renaming = Moving
If you need to rename a file with Unix, use the mv command. mv renames/moves the SOURCE to the DESTINATION. For example, in the next sequence we will make a new file on the Desktop, rename it, and then move it to our home directory. Follow along in the Terminal:
cd Desktop/touch test.txtmv test.txt mv_demo.txtmv mv_demo.txt ../mv_is_fun.txtNote:..is short forup one directory levelcd ~Note:~is a shortcut for yourhomedirectory (so many shortcuts!)lsNote: confirms thatmv_is_fun.txthas been moved/renamed
Copying Files and Directories
The cp command allows one to copy files/directories from a SOURCE to a DESTINATION. In other words, standard usage tends to look like this: cp ORIGINALFILE NEWFILE. If you need to copy a directory, though, and want to copy the entire directory structure inside of it, you can tell cp to recursively copy the directory and all of its contentscp -R OLDDIRECTORY NEWDIRECTORY.
Note: in either of the previous examples, one could also change the name of NEWFILE or NEWDIRECTORY by simply using a different name at the end of the NEWFILE/NEWDIRECTORY path.
When you need to copy files over a network you can use scp, which is virtually the same as cp but copies files or folders over a secure, encrypted network (preventing the possible interception of sensitive data via what is referred to as a Man-in-the-middle attack). You will use this command extensively when working with the Raspberry Pi 3.
Note: Though you will begin to memorize some of these commands through frequent use, it is normal to bookmark an online cheat sheet for reference.